In today's time, digital contents are changing very rapidly. Due to this content's author is very active now a days and changing their content frequently.
In CMS worlds, publishing content is one of the most used features of the content management domain used by content authors. In case of bigger client, you may have multiple content authors for managing the website content. They are changing the content even parallelly as well.
Now a days, we are seeing very frequently bulk publishing activities as well especially, when client having hundreds of products and they are launching websites for each of their products on the same platform to save cost.
When multiple people try to publish their content, you may have seen the slowness issue in publishing. Specially, when people send bigger packet for publishing.
Sitecore publishing is a feature responsible for publishing the content to make the content live. OOTB Sitecore publishing service use the worker process as CMS website use. It means, your CMS instance is handling the publishing job as well.
Sitecore provides a way to scale the Sitecore publishing. In this case, you create a different application on IIS that will be responsible for your publishing work. After this CMS instance will not be responsible for publishing job. Sitecore publishing application will be responsible for all publishing.
Sitecore Publishing Service is a separate Sitecore module that can be used to replace the existing or out of the box Sitecore publishing.
Sitecore Publishing Services is made of two different components:
- Sitecore Publishing Host: It's a separate independent web application. This is taking care of publishing job.
- Sitecore Publishing Service Module: This helps to configure Sitecore instance to scaled publishing web application and provide publishing dashboard to track the publishing job.
Prerequisites
Installation of Sitecore Publishing Service
Step-1 Download the Sitecore Publishing Service packages
Step-2 Create a folder c:\intepub\wwwroot\< custom_folder_name>
(I have a Sitecore instance of Sitecore 10.1.1, hence I am creating sc1011publishing)
c:\intepub\wwwroot\sc1011publishing
Step-3 Extract the package inside the custom folder.
Step-4 Create a new website in IIS and point to the folder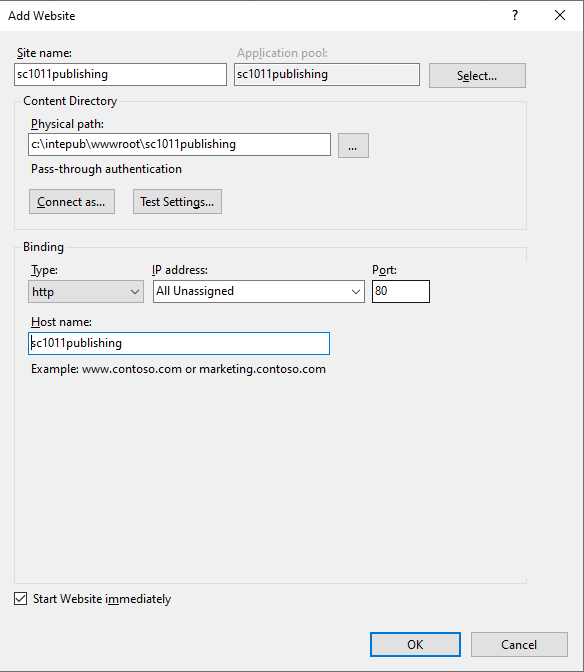
Step-5 Select the application pool of the website and right click. Select Basic Setting from the option.
Step-6 Select No Managed Code option from the .NET CLR version and click on OK.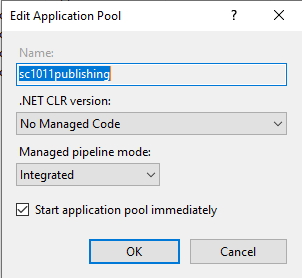
Step-7 Again, right click on the application pool and select the Advanced Settings option.
Step-8 Enter 0 for Idle Time-out (minutes) option.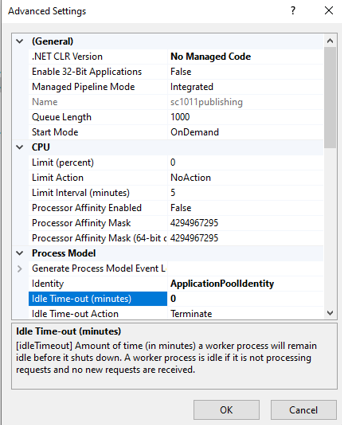
Step-9 Configure connectionstring for core, master and web databases of Sitecore. To update these connectionString, Sitecore provide a console-based tool/command.

Step-10 Run the below command to upgrade the database schema:
Step-11 Now your publishing website is configured, and you should validate the configuration. Use should open following URL in the browser to validate.
http://< sitecore-instance>/api/publishing/operations/status
http://sc1011publishing/api/publishing/operations/status
"status": 0
}
Installing and configuring Sitecore Publishing Module
We need to tell the Sitecore instance to use the Sitecore publishing service web application for publishing the content instead of existing OOTB publishing. For this, we need to install the Sitecore Publishing Module on the Sitecore instance.
Step-1 Download Sitecore Publishing Service Module 10.1.0
Step-2 Install this module on your Sitecore instance.
Step-3 In the Sitecore instance web root folder, go to the App_Config\Module\PublishingService\Sitecore.Publishing.Service.Config
Step-4 You can find below setting in this file
Step-5 Create a patch file and override its value with your newly created Sitecore Publishing Service web application path.
<configuration xmlns:patch="http://www.sitecore.net/xmlconfig/">
<sitecore>
<settings>
<setting name="PublishingService.UrlRoot">http://sc1011publishing/</setting>
</settings>
</sitecore>
</configuration>
Step-6 Open the command prompt on the administrator mode and execute the below exe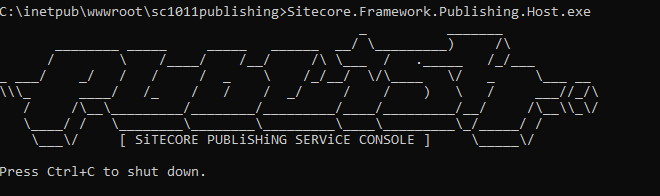
Now your configuration is completed and ready to use Sitecore publishing services.
You can find the Publishing option on the launchpad.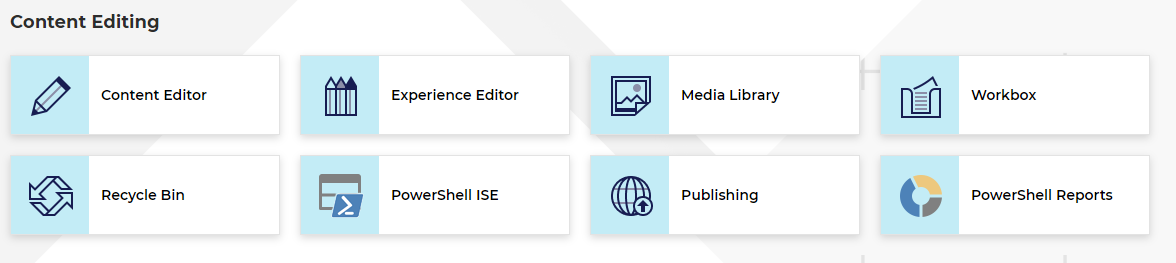
Click on the publishing to open the publishing service dashboard.
You can find the publishing dashboard.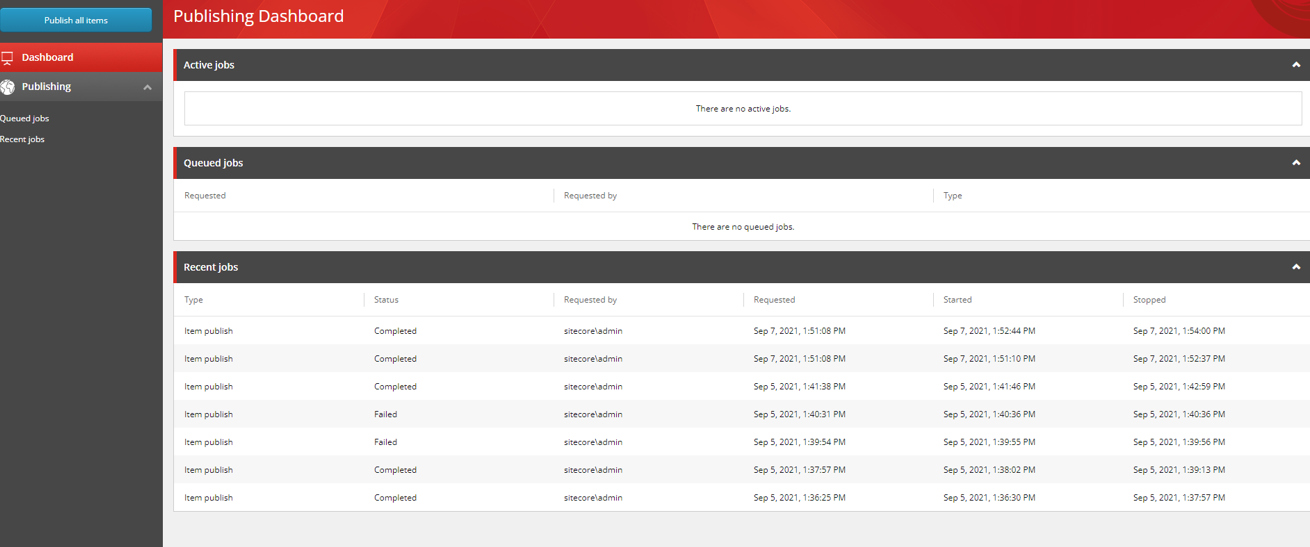
Advantages/Benefits of Sitecore Publishing Services
- Better user experience
- Support Multiple targets
- REST APIs to control the publishing service
- Support bulk publishing that helps to publish bigger Sitecore packets in lesser time
- Having dedicated application for publishing that improve the CMS performance as well as publishing job performance
- Can be tracked who have triggered the publishing job and what was the options selected while triggering the publishing job
- Can be checked the status of the publishing job
References:
SITECORE CLI LOGIN ERROR - /.well-known/openid-configuration: Bad Gateway
WALKTHROUGH OF ASP.NET RENDERING SDK
SETTING UP ASP.NET RENDERING SDK
DISABLE SITECORE PUBLISHING SERVICE
SETUP SITECORE PUBLISHING SERVICE
SITECORE CONNECT CONNECTOR - CONTENT HUB