Sitecore JSS is very hot now a day because of its headless architecture. One of the cool features of Sitecore is Sitecore Form, where marketer can create the Sitecore Form as per requirement without having much Sitecore or technical knowledge.
Sitecore JSS is also giving the facility to integrate the Sitecore Form.
Sitecore Form
We should create a Sitecore Form. Scope of this blog is not to tell you how to create Sitecore Form. You can use my earlier blog Sitecore Form for this task.
Create Form Rendering
To create a Sitecore JSS based Form Rendering, use the below PowerShell based command:
jss deploy component Form --allowedPlaceholders jss-main
This will create a rendering with the name of Form at /sitecore/layout/Renderings/Project/< JSS_Tenent> /Form
jss-main is the default placeholder. But you can change the placeholder name as per your requirement.
Now you should configure your Form rendering so that it can be used.
| Datasource Location | /sitecore/forms |
| Datasource template | /sitecore/templates/System/Forms/Form |
| Rendering Content Resolver | Sitecore Forms Resolver |
Now your Form rendering is ready to use.
Next thing is need to create a page and add the Form rendering in its presentation.
Add Form rendering on Page
Create a page under the Sitecore JSS app/tenant. For example, I have created a login page:
Step-1: Go to the login page Presentation -> Details -> Final Layout
Step-2: Click on Edit -> Control (on Left tab) -> Add
Step-3: Select Form rendering and provide placeholder (jss-main).
Step-4: Select “Open the Properties dialog box immediately.” checkbox and click on Select button. Select your created Sitecore Form.
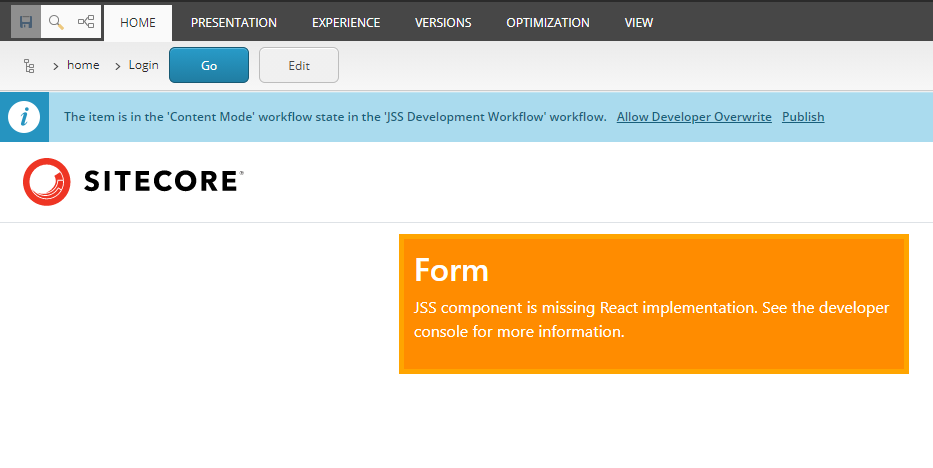
Now you open your page in the Experience Editor.

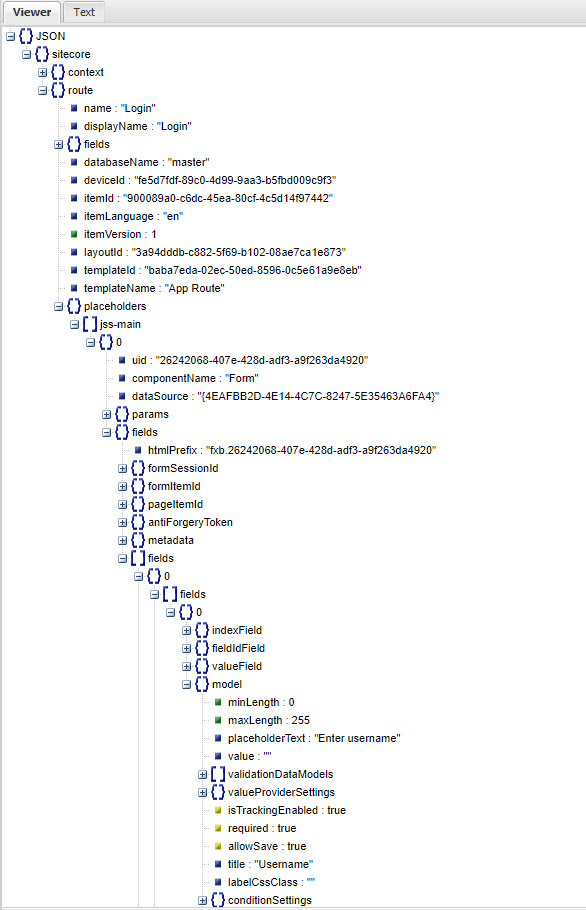
Please don’t be afraid. It’s expected. It is saying so far you have not created React JS component to show the Sitecore Form. So the next step is to create UI component to show the Sitecore Forms. But before proceeding to create a UI component, we should verify the Sitecore Form’s element and values in the layout service JSON response.
http://scjssdemo/sitecore/api/layout/render/jss?item=/login&sc_apikey={7401E111-1B1D-4958-B9A5-782181ABE68D}
Change the highlighted text as per your local machine setup/configuration.

Create UI for Sitecore Form
Sitecore has given two NPM packages for Sitecore JSS + Form. You should install these two NPM packages first.
- npm i @sitecore-jss/sitecore-jss-forms
- npm i @sitecore-jss/sitecore-jss-react-forms
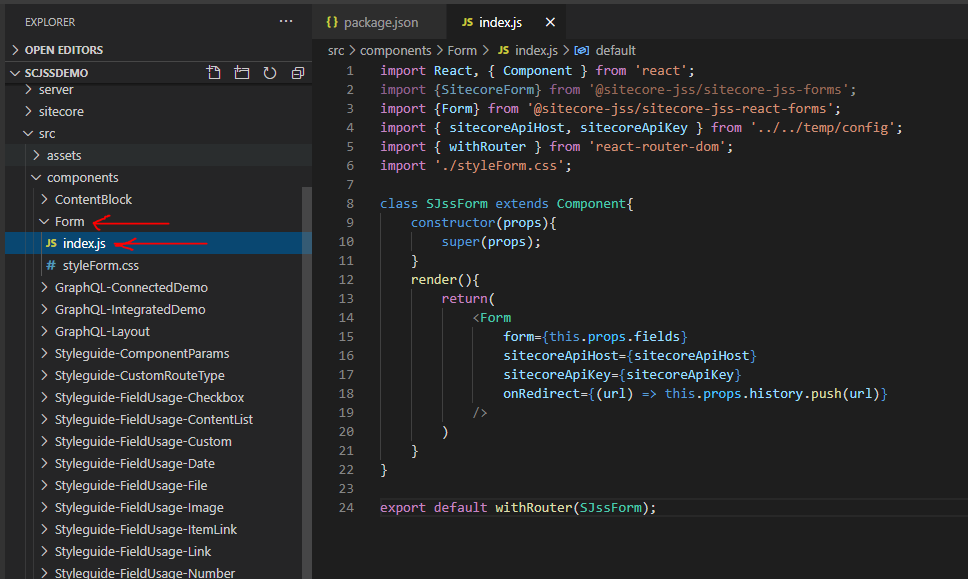
After installing these two packages, you should create a Form component inside the ReactJS.
Create a folder with the name of “Form” under src->component folder.

Add index.js file under Form folder and use the code mentioned above.
Now your UI component is ready. You can deploy your code using following command:
jss deploy app --c --d
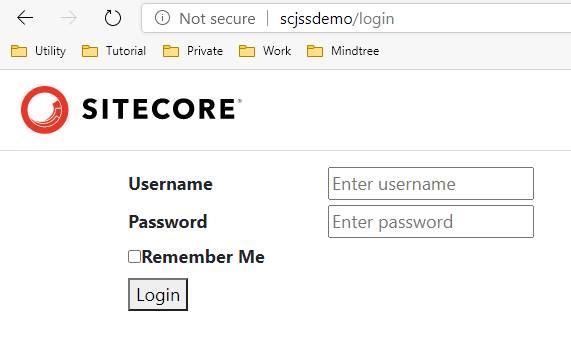
Browse your page having form.

Limitation of Sitecore JSS + Form:
- We can not use Code First approach to work on Sitecore JSS + Form. We must have to use Sitecore First approach for this.
References:
SITECORE CLI LOGIN ERROR - /.well-known/openid-configuration: Bad Gateway
WALKTHROUGH OF ASP.NET RENDERING SDK
SETTING UP ASP.NET RENDERING SDK
DISABLE SITECORE PUBLISHING SERVICE
SETUP SITECORE PUBLISHING SERVICE
SITECORE CONNECT CONNECTOR - CONTENT HUB